Installing interior doors is an essential part of any home renovation or construction project. Properly installed doors can enhance the look of your home, improve privacy, and ensure the smooth functioning of rooms. This guide will walk you through everything you need to know about installing interior doors, from preparation to completion.
Preparing for Installation
The first step to successfully installing an interior door is preparation. Start by measuring the door opening to ensure that the new door will fit properly. Accurate measurements are crucial to avoid issues later on. Measure the height, width, and depth of the opening, and also consider the type of door you are installing—whether it’s a pre-hung door or just a slab door.
Make sure you have the right tools on hand for the installation. Typically, you will need a tape measure, level, hammer, screws, screwdriver, shims, a saw, and a utility knife. Prepping the space also involves clearing out any obstacles and ensuring you have a clean working area.
Before beginning installation, check the condition of the door frame. It should be square, level, and plumb. Any inconsistencies may need to be corrected before proceeding, as they could affect the fit and function of the door.
Installing a Pre-Hung Interior Door
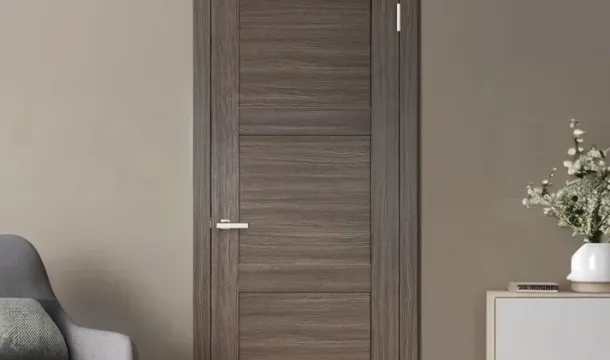
A pre-hung door is a door that comes already mounted to a frame. It is one of the easier options for installation since it takes the guesswork out of fitting the door into the existing frame.
To install a pre-hung door, start by placing the door in the rough opening. Use shims to make sure the door is level and plumb. The shims should be placed at the hinge locations to provide solid support for the door. Once the door is in the correct position, secure the frame to the wall with screws or nails.
Check the alignment of the door before tightening all the screws. Make sure the door swings freely without binding, and that the gap between the door and the frame is consistent all the way around. This ensures a snug fit that will not lead to drafts or issues with opening and closing.
Installing a Slab Door
Installing a slab door—one that does not come with a frame—requires a bit more precision but can be a rewarding project. Start by marking the locations for the hinges on both the door and the frame. You may need to chisel out recesses for the hinges so that they sit flush with the door and frame.
Once the hinge locations are prepared, attach the hinges to the door. With the help of another person, hold the door in place and attach it to the door frame. Make sure to check the fit to ensure that the door swings properly without scraping against the floor or frame.
Installing the handle and latch is the next step. Mark the location for the latch on the edge of the door and drill the necessary holes. Attach the latch plate and install the door handle according to the manufacturer’s instructions. It’s important to check that the latch lines up with the strike plate on the door frame to ensure proper closure.
Final Adjustments and Finishing Touches
Once the door is installed, make any final adjustments to ensure it operates smoothly. If the door rubs against the frame or floor, you may need to trim it slightly. Use a plane or sandpaper to make minor adjustments, being careful not to remove too much material.
Adding trim around the door frame gives the installation a polished look. The trim should be cut to fit around the door frame and nailed securely in place. Caulk any gaps between the trim and the wall for a seamless appearance.
Painting or staining the door is another important step in the finishing process. This not only improves the appearance of the door but also protects it from moisture and wear. Be sure to use a paint or stain that is suitable for the material of the door.
Common Installation Challenges
Even with proper preparation, challenges can arise when installing interior doors. One common issue is an uneven or out-of-square door frame. This can lead to a door that does not hang correctly or does not close properly. Using shims strategically can often correct these issues, but in some cases, the door frame may need more extensive repairs.
Another common challenge is dealing with an oversized or undersized door. If the door is too large, trimming may be necessary to make it fit. If the door is too small, it can lead to unsightly gaps that affect both aesthetics and privacy. Always measure twice to avoid such problems.
Installing interior doors can be a straightforward process if you are well-prepared and take the time to measure accurately. Whether you’re installing a pre-hung door or a slab door, the key is to ensure that everything is level, plumb, and secure. Properly installed interior doors enhance both the function and beauty of your home, providing privacy and a polished finish to your living spaces.
With the right tools, careful measurements, and a bit of patience, you can successfully install interior doors that add value and appeal to your home.